

How to Create a Home Photography Studio
Creating a home photography studio is one of the most rewarding projects for anyone passionate about photography. Whether you’re a professional photographer, content creator, or hobbyist, having a dedicated studio space allows you to control lighting, backgrounds, and composition — all essential for producing high-quality images. The good news is that you don’t need a massive budget or a large room to make it happen. With thoughtful planning and a few smart design choices, you can transform a corner of your home into a fully functional and inspiring photography studio.
Choosing the Right Space
The first step is finding the right location for your studio. Ideally, select a room with plenty of natural light and enough open space to accommodate both your subject and equipment. Spare bedrooms, basements, attics, or even garages can work well if properly organized. If possible, choose a room with neutral-colored walls and minimal clutter to avoid unwanted reflections and distractions in your shots.
If natural light is your priority, pick a room with large windows that face north or south — this provides consistent, soft lighting throughout the day. However, if your photography relies on controlled lighting, a darker room is preferable since it’s easier to manipulate artificial light sources.
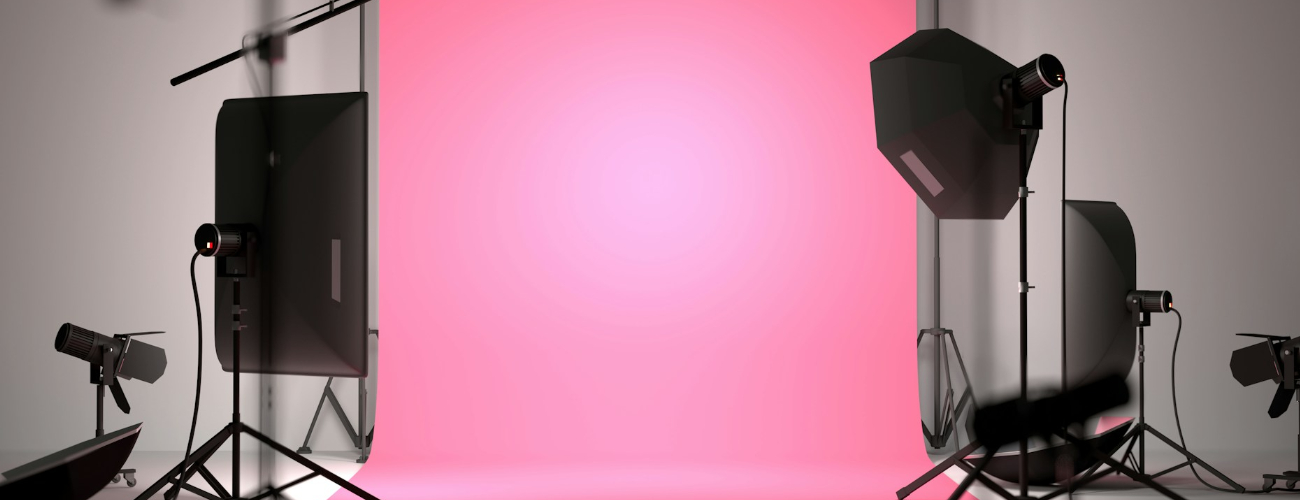
Setting Up the Background
A clean and versatile background is essential in a photography studio. Seamless paper rolls are a popular option because they come in a wide range of colors and can easily be switched out for different projects. Mount them on a wall or use a portable backdrop stand for flexibility.
For portraits or product photography, consider neutral shades like white, gray, or beige, as they keep the focus on your subject. Fabric backdrops made of muslin or canvas add texture and depth, while collapsible backgrounds are great for small spaces. You can also get creative — use wooden panels, brick wallpaper, or even a painted wall to add variety to your shoots.
Lighting: The Heart of the Studio
Lighting is what truly defines the quality of your photos. Even with the best camera, poor lighting can ruin a shot. Start with a basic setup that includes a key light, fill light, and background light. Softboxes or umbrella lights help diffuse light evenly, eliminating harsh shadows and creating a flattering effect on your subject.
If you’re working with natural light, use sheer curtains to diffuse sunlight and prevent overexposure. Reflectors are also valuable tools — they bounce light onto darker areas of your subject, helping achieve a balanced look. For maximum control, invest in LED continuous lights or flash strobes with adjustable intensity.
Position your main light at a 45-degree angle to your subject for soft, natural-looking shadows. Experiment with different setups to discover how light direction and intensity affect the final image.
Essential Equipment and Storage
A functional studio doesn’t need to be filled with gear, but a few essentials are necessary. A sturdy tripod ensures sharp, consistent shots, while light stands and clamps help position equipment securely. For portraits, a comfortable stool or posing chair can make a big difference.
If you photograph products, invest in a shooting table or flat surface where you can arrange items neatly. Keep your space organized by adding shelves or cabinets for props, lenses, and accessories. A tidy studio not only looks professional but also improves workflow and creativity.
Flooring and Wall Considerations
The floor in your studio should be both functional and visually appealing. Hardwood, vinyl, or laminate flooring works well for portraits, while simple roll-out vinyl backdrops can provide flexibility for full-body shots. Avoid glossy finishes that reflect light unless you intentionally want that effect.
Neutral-colored walls are ideal, but consider painting one accent wall in a darker tone for creative contrast. Alternatively, use removable wallpaper or fabric panels to switch up your studio’s style easily.
Sound and Comfort
If you plan to record video or capture audio, soundproofing is an important consideration. Use acoustic foam panels or thick curtains to minimize echo and outside noise. For long shoots, ensure proper ventilation and comfortable seating. A small desk for editing or previewing images can also make the space more functional.
Final Touches for Professional Results
To create a professional yet inspiring atmosphere, personalize your studio with framed photos, plants, or minimalist décor. These touches make the space more inviting without distracting from the purpose. Keep extension cords organized and lighting cables secured to maintain safety and accessibility.
Consider adding a full-length mirror for subjects to check their appearance before shooting and a small changing area if you photograph models. Good organization and attention to detail go a long way toward creating a seamless creative experience.
Final Thoughts
A home photography studio offers freedom and flexibility that every photographer can appreciate. By carefully planning your layout, investing in proper lighting, and keeping your space organized, you can create a studio that supports your artistic goals and enhances your work’s quality. Whether you’re shooting portraits, products, or creative projects, a well-designed home studio provides the control and inspiration you need to capture stunning images — all without leaving your own home.